Winter is an important time during the Wheel of the Year for making medicines. Keeping one’s tincture and tonic stock flowing can easily segue from pastime to part-time occupation. When I’m making medicine, you can be certain I always add magick to the mix, as well.
A tonic as old as time, recipes like Fire Cider were passed freely down through the generations. It was first written down by Rosemary Gladstar in the 1970s and utilized by community herbalists for decades until Shire City Herbals trademarked it in 2015. In 2019 two brave herbalists fought a legal battle to have Fire Cider returned to a generic term. Fortunately, for community herbalists, and their customers, they prevailed.
At the beginning of the current pandemic, I made my first batch of fire cider and filmed the process. The recipe turned out most delicious! We have been slowly sipping away on this batch with ample amounts to share. It’s getting to be time that I prepare some more, so I thought this a good lesson in Kitchen Magick for all. I make no mention of the magickal properties of the ingredients in the video, but I invite you to consider that the medicinal and magickal attributes are nearly always the same. This potent and precious brew could also be used to ward and protect should you need to use it in such a way. Though, I think the act of ingesting it automatically does the same thing!
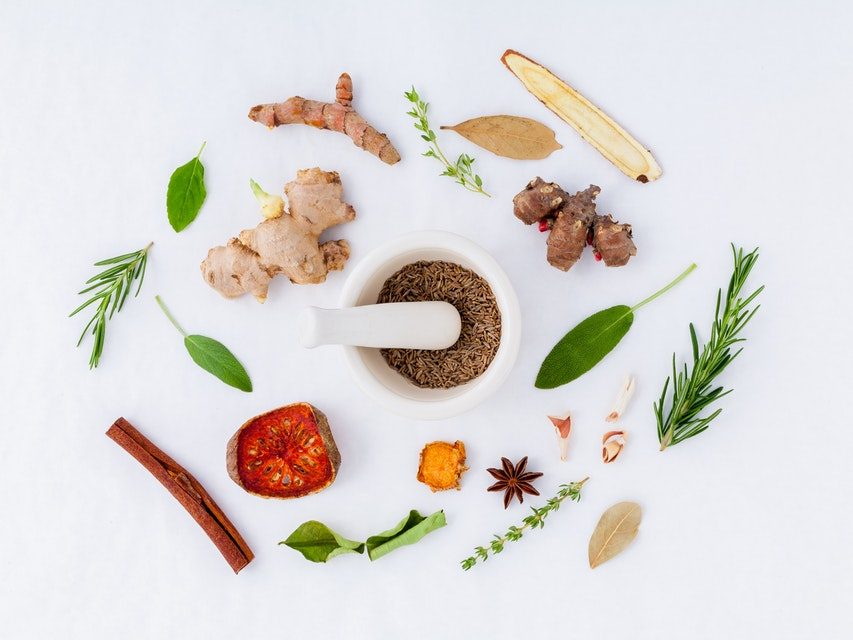
Let’s take a look at the magickal properties of Fire Cider ingredients according to Cunningham.
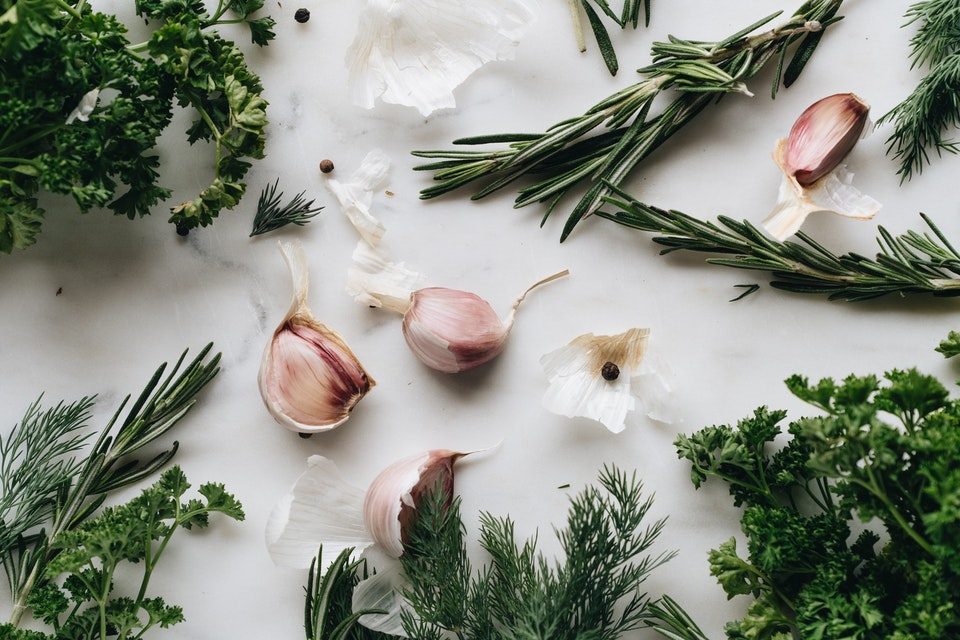
Apple Cider Vinegar: Venus. Water. Love Healing. Purification.
Experiment with adding your own ‘special ingredients’ to a batch of Fire Cider. If you’d like to know more about the history of Fire Cider (and get Gladstars’s original recipe) click HERE.
One last idea for you: After I strained the finished oxymel, I used all of the solid ingredients for a marinade/dry rub. I packed everything into a Romertopf clay pot and let the melange do its thing for about 24 hours. Then I roasted the dish in the oven for the allotted time. It was sublime! Finally, all that remained was composted. In the end, I feel that I made FULL use of the medicinal ingredients!
I was driving yesterday when a CD I hadn’t listened to in a few months rotated into pole position. The sunny sounding guitars were woefully out of tune with the winter scene before me. As I was trying to remember how to drive on icy city streets I was struck with a feeling that winter had arrived too quickly this year. That isn’t really true, we were blessed with a glorious and lengthy Autumn, but it feels true when enduring the second subzero cold snap inside of a month and it isn’t even the winter solstice yet! There is only one sensible thing to do when one lives in a climate like this, embrace it! Playing with the weather has its own unique rewards season to season and Winter offers some of the best fun of the entire year!
I don’t make as many snowmen as I did when I was a kid or when my stepkids were little anymore, but I do have a winter sculpture tradition that I want to share with you. A couple of years ago I came across a pin of an ice luminaria on Pinterest from Hanna’s Charming Christmas that captivated me, but her gorgeous blog is written in Swedish which I’m not fluent in. My background in mold making made it easy for me to understand how to construct one with materials already on hand. All it takes to make these stunning luminarias is a little planning to collect the proper materials and freezing temperatures from Mother Nature!
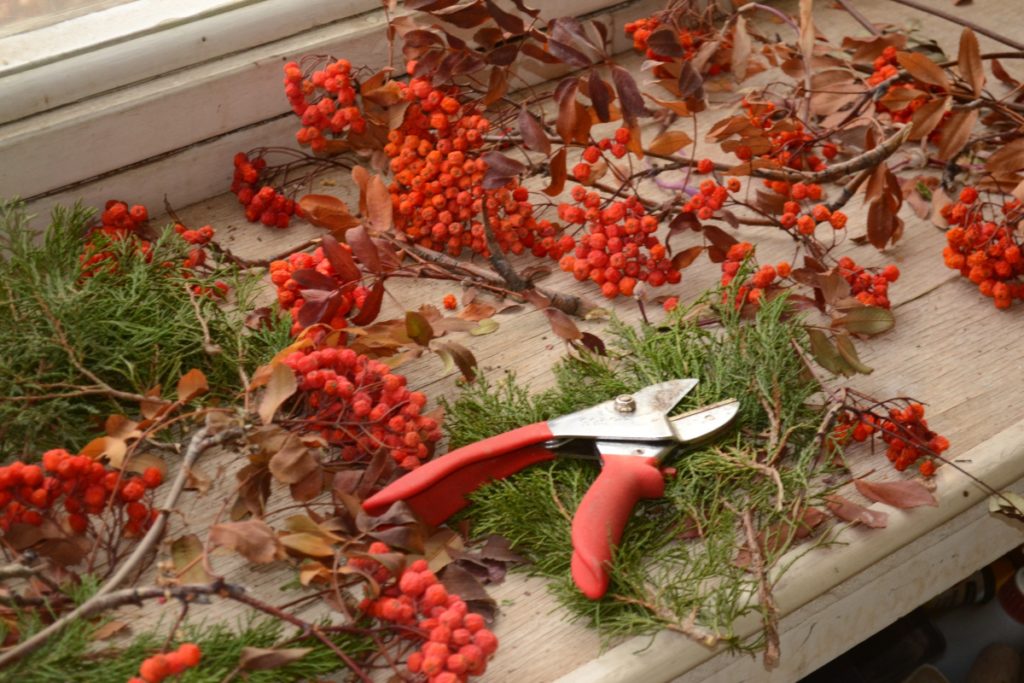
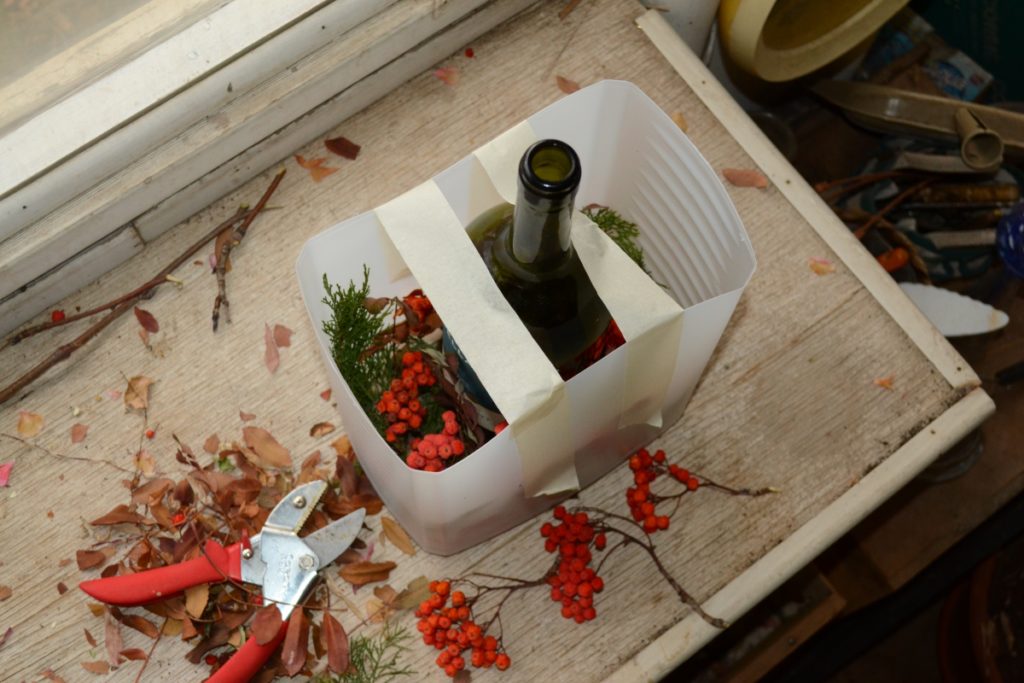
Now is a good time to scout out any trees that have berries on them that will add bright color to your luminarias. Last year I had spotted a gorgeous Rowan tree in late fall down my alley, but by the time I went to collect berries at Yule time the neighborhood squirrels and birds had laid their rightful claim to them. I used frozen cranberries instead and they were just as lovely. The juniper was clipped from a hedge in my garden.
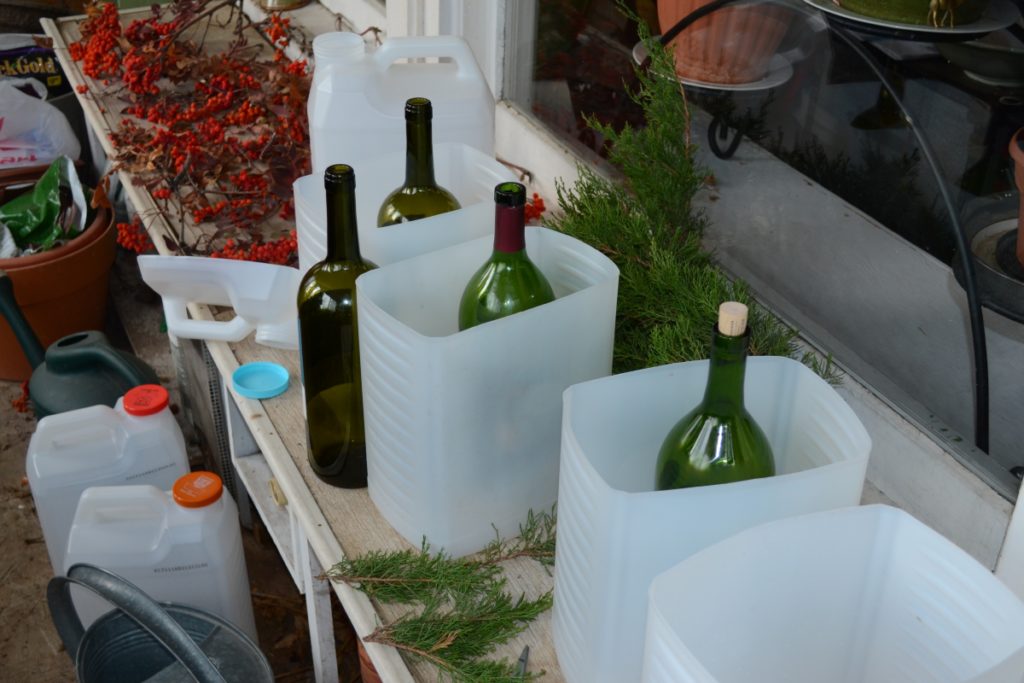
I like to use a wine bottle and a larger vessel to create the mold. In the past I’ve used things like plastic mixing bowls. This year I used the plastic containers I buy my kitty litter in. The wine bottle is good because the neck will give you something to tape down when the water displaces and the bottle and it starts to rise. We collected magnum sized bottles and old litter containers for a couple of months in advance this year because we wanted to make tall luminarias, but use whatever you have on hand to get started. Once you’ve collected your materials and have confidence that the low temperature will be below freezing it is time to construct the luminarias.
Instructions
1. Begin by placing the wine bottle in the center of the larger vessel.
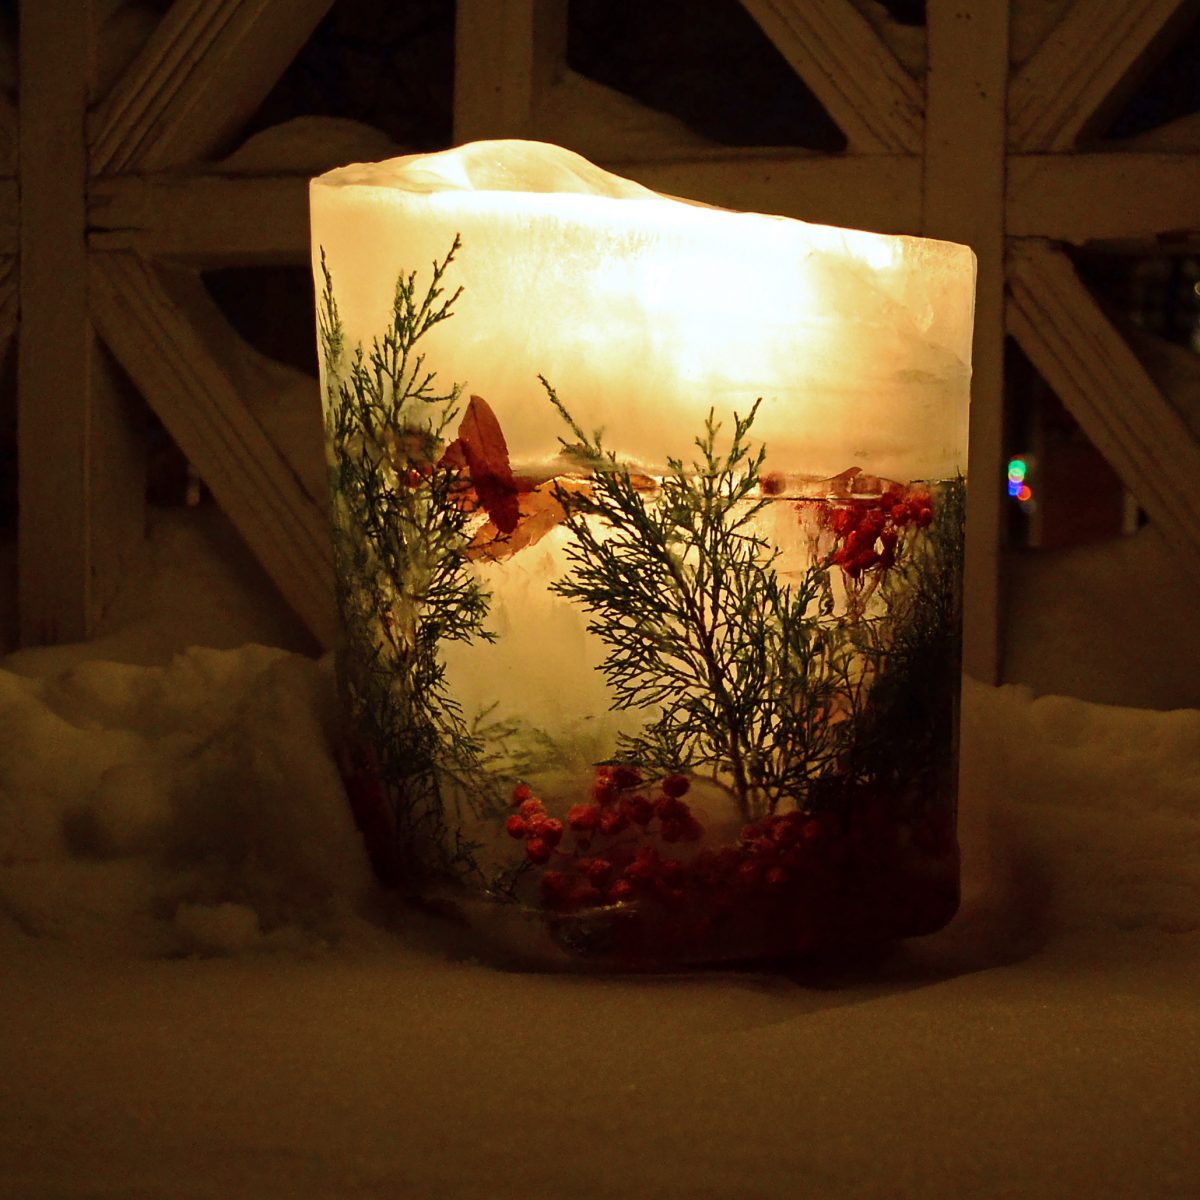
2. Place the botanical materials around the wine bottle taking care to fill in the corners and consider the overall design. Bear in mind that pouring water in the mold will jostle things a bit, but they will be relatively close to where you first put them. I like to place berry clusters in opposite corners along the bottom, for example. Take care not to overwhelm your luminaria with too much foliage, etc. Think in terms of line and silhouette for the most dramatic effect.
3. Once you are satisfied with the placement of the vegetative material it is time to tape the wine bottle down. I take two long pieces and tape from one side of the large vessel, over the neck of the bottle to the opposite side and repeat on either side. Leave a little bit of slack so that you can adjust for the way the bottle moves once the water is poured into the mold. You do want the bottle to float up a little so it forms ice underneath. That’s where you will place your candle to light the luminaria.
4. Slowly fill the mold with water about two-thirds of the way up the mold taking care not to move any of the berries or botanical material by pouring too vigorously. I try to aim for the side of the bottle and pour as gently as I can. I leave the last third to be filled later, once the first pour has frozen. This keeps the vegetation in the center of the luminaria, instead of rising to the top and freezing in place there.
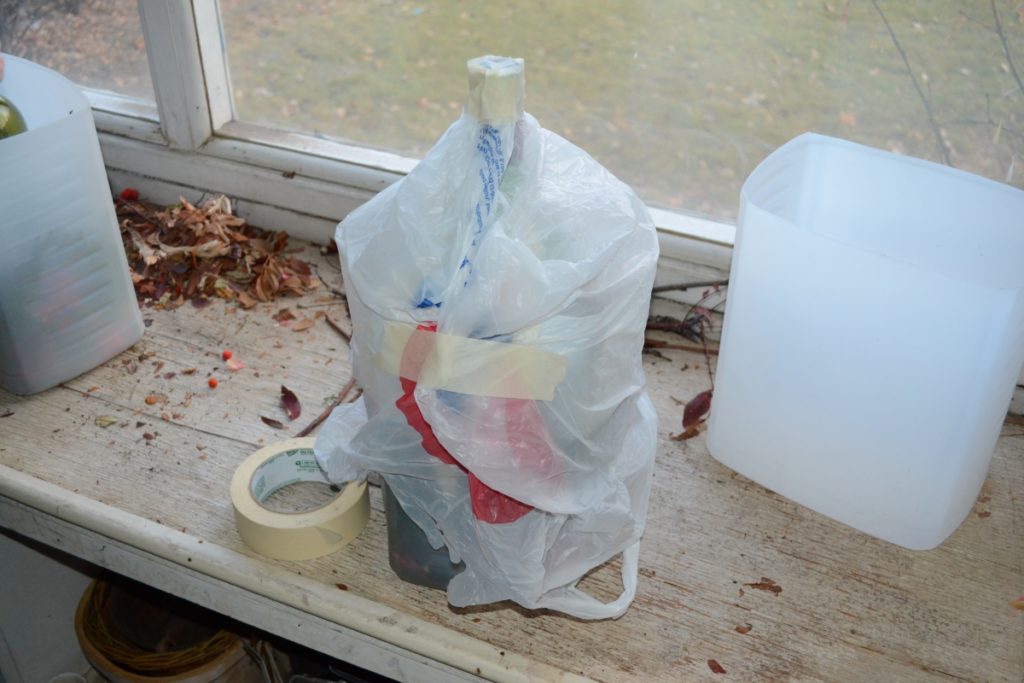
5. This step is optional, but helpful. Covering the mold with a plastic bag and taping it on helps to secure the bottle into place even further and it keeps any debris from falling into the water as it freezes.
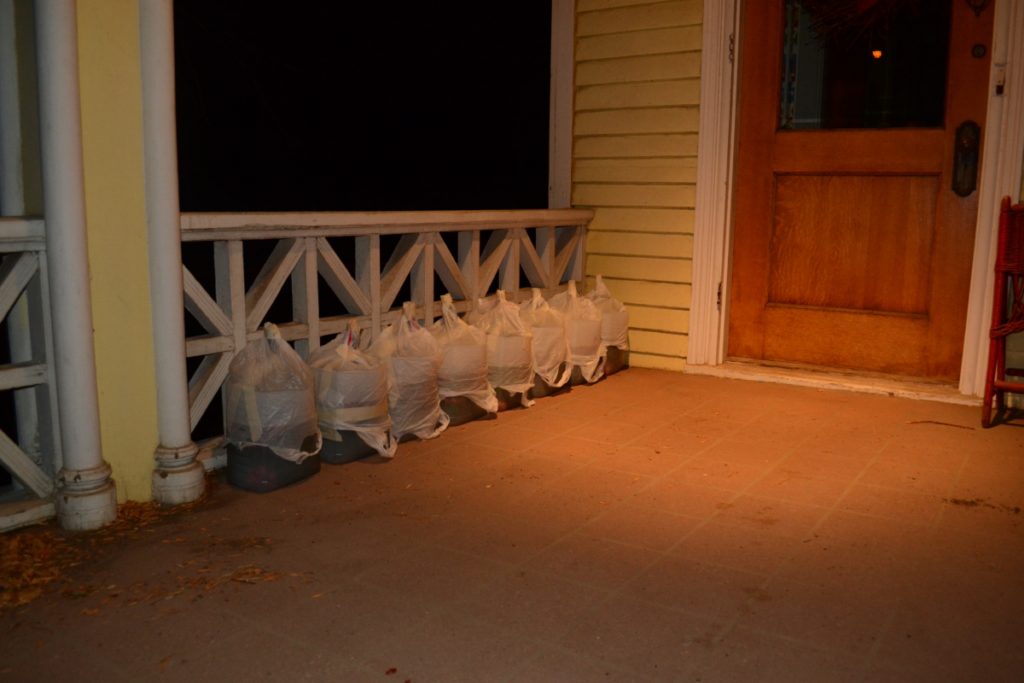
6. Place outside and allow to freeze. This can take several days and if you live in the second most unpredictable U.S. city for weather like I do it might take an entire week! Once it has frozen go ahead and fill up the rest of the mold with water to allow the top third to freeze. Be sure to keep the water level no higher than the straight sides of the bottle. If the water goes above the curve at the base of the neck, the bottle will become locked into place once the water freezes into ice. In my experience, this top layer can freeze differently than the bottom layer in terms of how clear the ice is and can add a beautiful detail. Take that idea even further by adding food coloring to the top layer, for example.
7. After a day or two in freezing weather the luminarias should be ready. To unmold them pour hot water into the wine bottle and twist it about until it frees up. It can take a couple of pours of water to get it unstuck. Because we upcycled our old kitty litter containers we simply cut the outside off with a utility knife. Last year I used plastic mixing bowls and turned them over in the sink once the bottle was removed and ran hot water on the outside of the bowl until it lifted off.
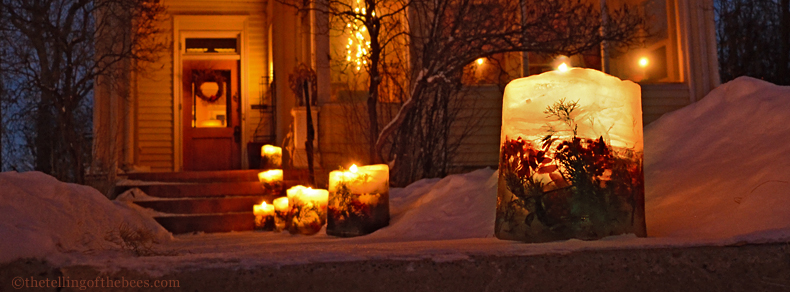
8. Now the luminarias are ready to be set in place. A small white votive is the best way to illuminate them, but I have used LED candles in a pinch. Nothing beats the beauty of fire shining through ice, though.
The end result is a gorgeous ice luminaria. I am always enchanted by their simple elegance. It’s impossible to improve upon natures design. These are a true favorite for kindling some holiday magic!